Guide to painting Tiny Furniture DnD Bar Scene complete

Painting D&D Tavern From Tiny Furniture!

Hello! The ‘theatre of the mind’ can be tough for tabletop role players, especially if imagination or resources are lacking. Fortunately, our friends at Tiny Furniture have you covered! They lovingly create very detailed and characterful scenery pieces perfect for your roleplaying needs. As we have mentioned before, scenery pieces often get neglected when we are painting. But with some quick tips we can have a small but effective focal point so read on to discover tricks for painting d&d tavern from tiny furniture!

Table of Contents

Painting D&D Tavern From Tiny Furniture: Getting Started

painting d&d tavern from tiny furniture Tutorial for Tiny Furniture DnD Bar Scene construction phase
Milliput & coffee stirrers... the hidden heroes!

I used an old cardboard box as a framing device for the scene I wished to create. Its compact size also meant I would not create anything too unwieldy, and would be easy to transport to any games. I used coffee stirrers for my wood panels, as they are naturally a good scale for wooden floorboards and skirting. They also have a naturally textured surface which will be perfect for the wood effect. I cut them to irregular lengths to help give a less uniform appearance. For the stone wall I rolled various sized balls of milliput and ‘squashed’ them into the backwall, which I think has given a nice overall look. Finally, I picked the tavern scene parts I wanted for my vignette- these were resin so needed a quick wash in warm, soapy water, and gluing with superglue.

Painting D&D Tavern From Tiny Furniture: Zenithal Priming

How to paint DnD Bar Scene zenithal phase
Zenithal will really help with the later stages, here.

Overnight, the milliput cured hard and so was ready for priming. I primed the tavern setting with a quick black spray prime, but the bar set itself I was sure to ‘Zenithal Prime’. This is where you use two tones of primer to help create lightfall and volume. The added bonus here was that with the lighter prime color on top, I could use quick shades and inks to color the scene very quickly and effectively. The black and gray areas underneath them would naturally form the shadows and midtones, whereas the whiter areas would essentially become ‘pre-highlighted’. Some of the white was ‘splattered’ on parts by flicking the tip of a brush loaded with white paint- try using the RGG dry brush. I was hoping this would create interesting modulation and texture to the wood once it was colored. When time is short, work smarter, not harder!

What Do I Want To Achieve With This Miniature?

Guide to painting Tiny Furniture DnD Bar Scene complete

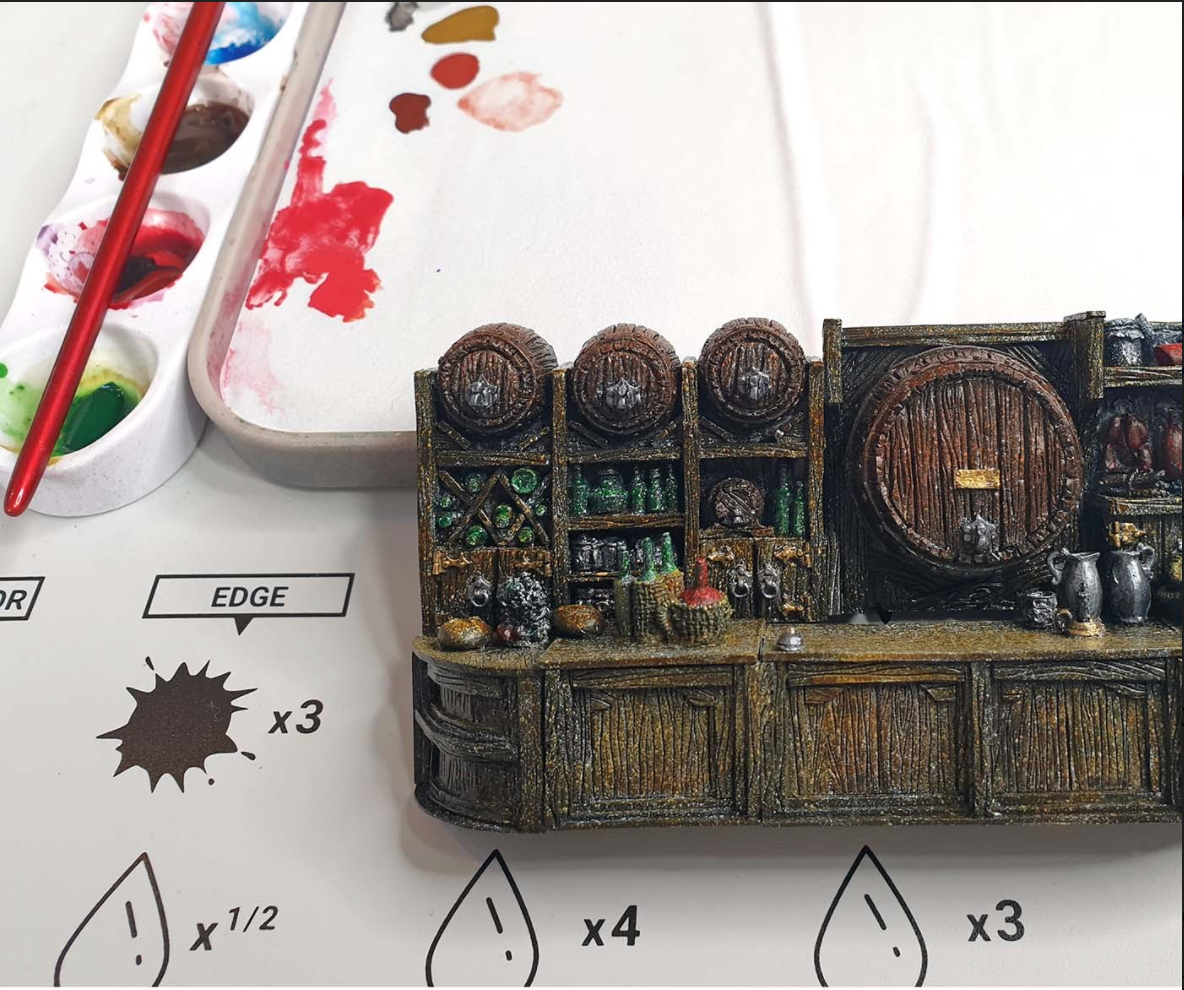
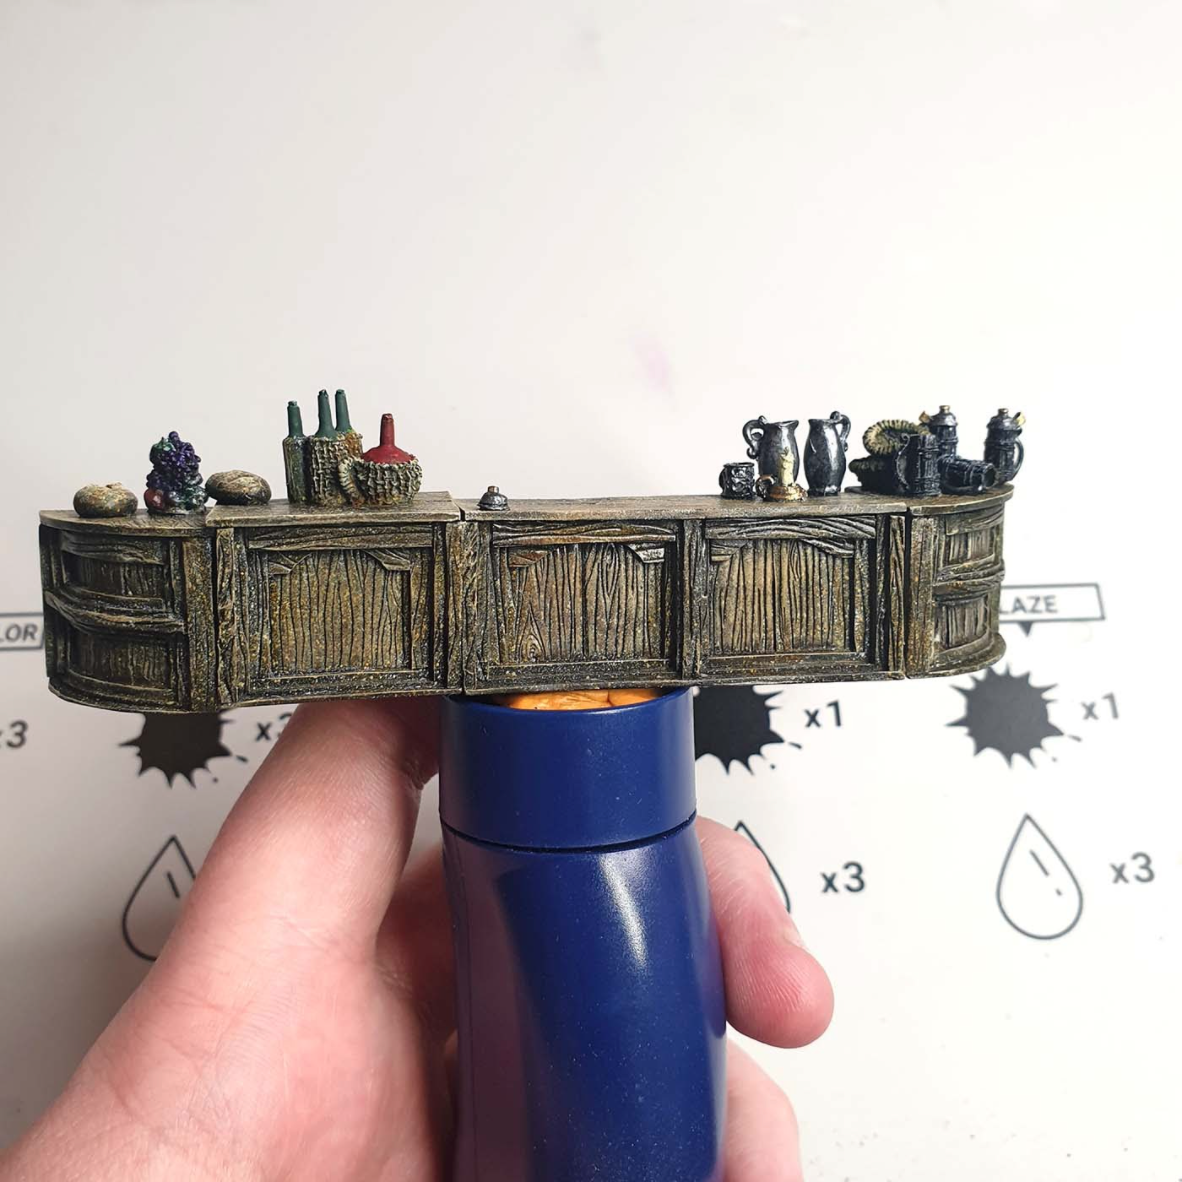
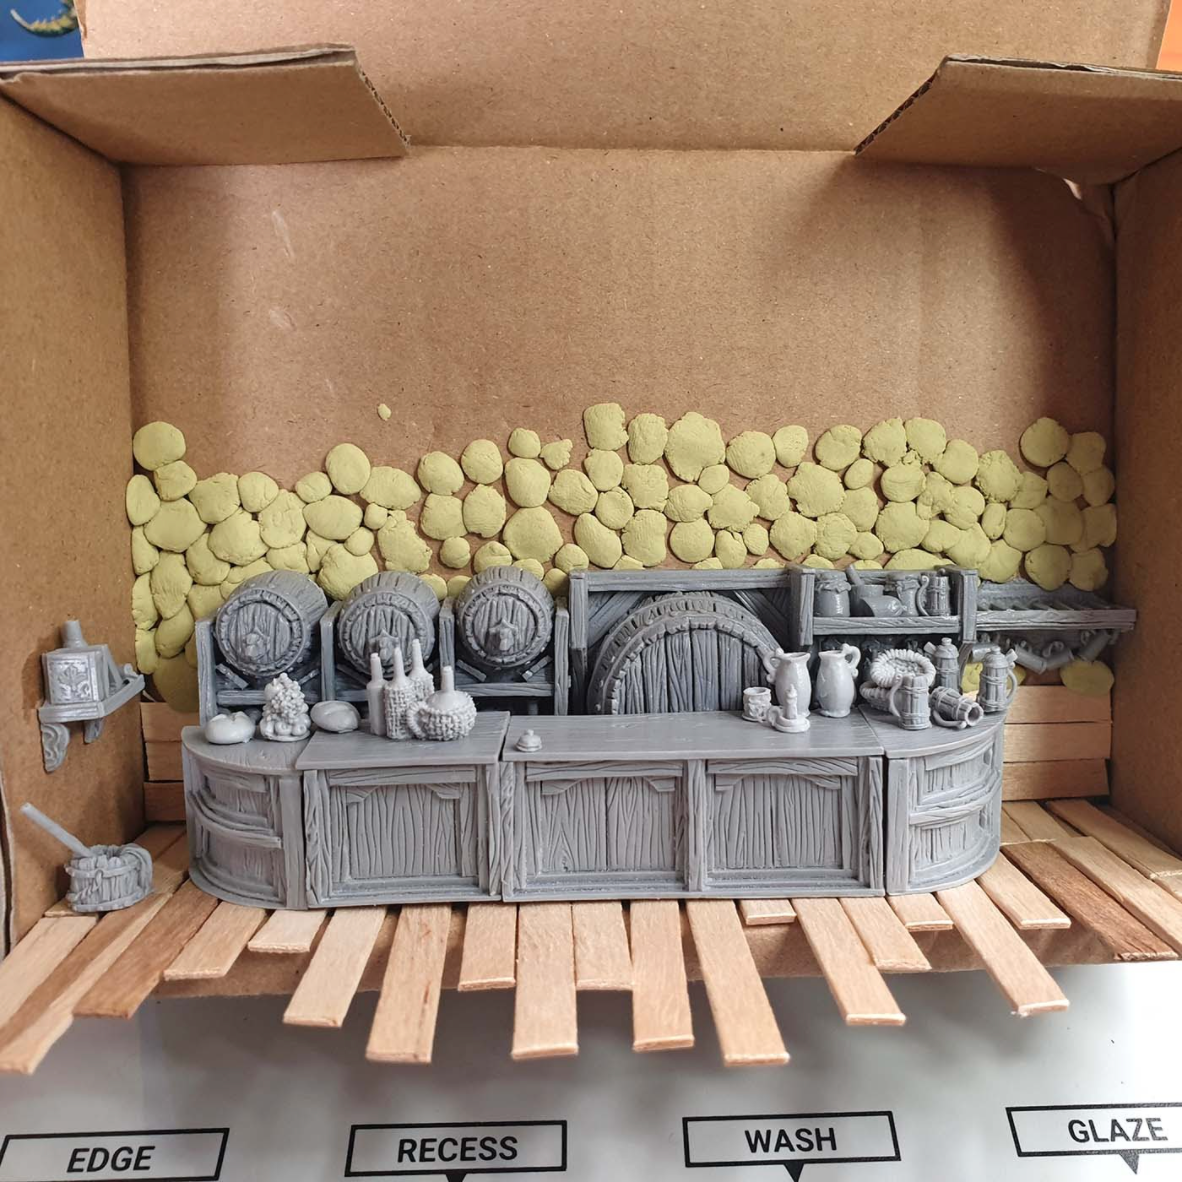
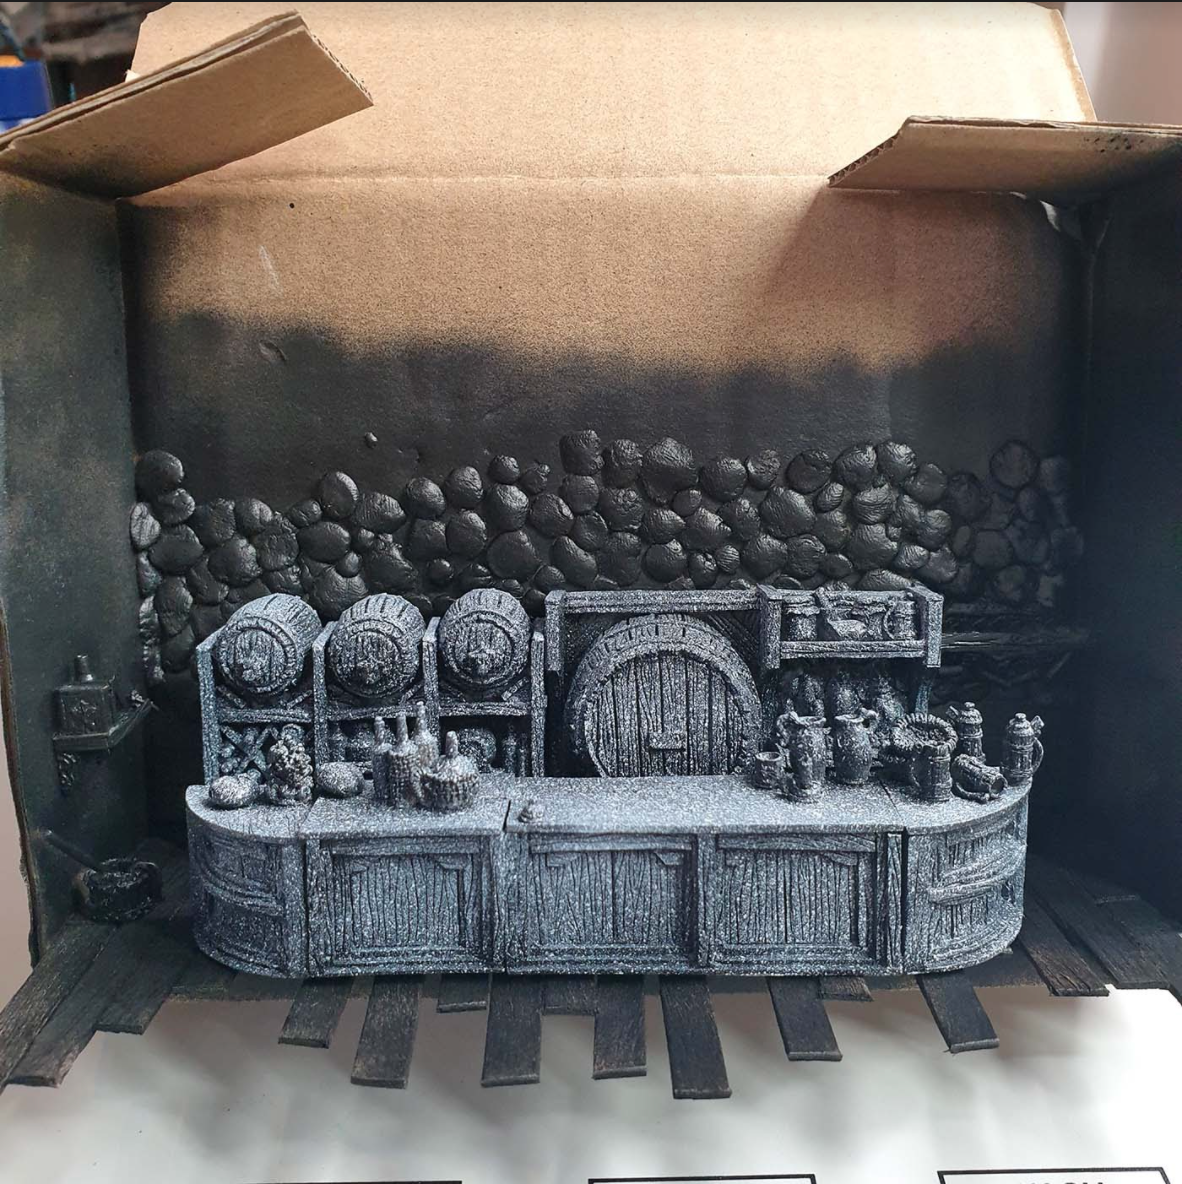
With potentially a large scene - as I could expand out and create a whole multi-storey tavern! - it is important to focus on the most important aspects. In a tavern scene in DnD, surely it is the bar area. Here, our players would meet the innkeeper, retrieve gossip and quests, and jostle with NPCs for a beer. There are lots of details that could serve as story hooks, such as the food and drink on the countertop. By making the bar the focus of our painting efforts, it can at least subconsciously direct players that this is an important place to explore.

What is going to be the thing that draws the our eye in this scene? There is no face on a miniature, here. So instead we shall make sure that the bar itself is well highlighted and with points of interest, in order to draw the viewer in and start asking questions. 

Painting D&D Tavern From Tiny Furniture: Quick Shades

DnD Bar Scene Tiny Furniture quick shades and inks phase
Let the zenithal priming do the heavy work for you!

Now for the fun part! Quick and enjoyable to do, I like to use quick shades in situations like this. I used a yellow-brown for the bar itself and a red-brown for the barrels behind the bar. So that it wasn’t all shades of brown, I was sure to pick out some key details, such as using silver for pewter flagons, green for wine bottles and red for cured meats.  There was also the odd gold detail here and there, to help break things up. This really didn’t take very long, but did help achieve a very ‘lived in’ appearance for the bar area and helped highlight the character of the sculpts.

I recommend the RGG size 2 brush on quick shade jobs like this one, as it has a big reservoir (or ‘well’) but a good point, which means I have everything covered efficiently! And a Redgrass Creative wet palette wavy accessory is invaluable for using inks and quick shades rather than on the palette paper.

How To Proceed:

Looking at the bar scene, post-quick shade, I was worried it was too dark. The shades, too, despite their advantages for quick painting, were leaving a finish that was too glossy for my liking. It is important, I think, in the miniature painting process to take breaks and reflect on the next steps. Think critically about what you would like to improve with the time and resources allocated to the project at hand before moving on to the next stage or miniature. It was fine, but it was not quite what I wanted. I had some suggestions to remedy these feelings, so I could proceed quickly.

It is important, I think, in the miniature painting process to take breaks and reflect on the next steps.

Painting D&D Tavern From Tiny Furniture: Drybrushing

I realised I wanted to lighten things up and matte the finish. For this, a drybrush will create some quick and interesting highlights on the wood grain and further, ‘dry out’ the glossiness. What I enjoy about drybrushing is how it creates natural highlights by working with the sculpt, and doesn’t require edge highlighting. First, I used a walnut color across all the wooden areas, and then used a creamy yellow on the bartop and raised areas. I imagined areas that got a lot of use from servers and patrons would be well worn, and any varnishes and wood color would be faded. I did a similar effect for the floorboards by the bar, too!

For the stonework behind the bar, I also used a drybrush technique in order to quickly yet realistically get a stony look, with a pale blue-gray, and then a little white to catch the most prominent edges. If it is still too glossy for your tastes after this stage, I recommend a good matte varnish.

Tiny Furniture DnD Bar Scene dry brush phase

I imagined areas that got a lot of use from servers and patrons would be well worn, and any varnishes and wood color would be faded. I did a similar effect for the floorboards by the bar, too!

Painting D&D Tavern From Tiny Furniture: Completed Scene!

And so, there you have it! In very little time at all, we have an immersive bar scene suitable for our roleplayers trying to get into character and enrich our tabletop encounters. It helps when we can use such characterful and detailed sets like this one from Tiny Furniture. We can also use things like package boxes, coffee stirrers, and epoxy to make diorama settings relatively quickly and efficiently. There is also scope – as it is modular- to expand over time. But for now, don’t mind me, I’m off to the bar!

Guide to painting Tiny Furniture DnD Bar Scene complete
The finished tavern diorama!

Paint your D&D scenery using these Redgrass Painting tools

You are currently looking at the website for Switzerland