Painting Infinity Miniatures

Hello! In this tutorial “Painting Infinity Miniatures” we are painting a limited edition ‘Dragon Lady’ model from the Infinity game. Painting inifinity miniatures is a fun change of pace! It is a wonderful model, that despite its small size, is packed with detail. However, as mentioned before, red is a tricky color. Shading it and highlighting it can be difficult. So read on!
Table of Contents
Painting Infinity Miniatures: GETTING STARTED
Step one, I assembled the mini with superglue. Unlike minis you may be used to, these are metal, and plastic cement will be useless here. I also used heavy clippers for this as metal could blunt or break my precision nippers I use on plastic models. I made a hole in the base so the ‘tab’ the model stands on could slot in. With heavier metal models like this stability is important! My RGG360 painting handle came in handy to hold the dragon lady during the painting session.
Priming 101

Next, I primed the model. Perhaps more so with metal models, a good priming stage is very useful. It helps acrylics adhere to the model. Furthermore, you may find metal models chip more, so priming can help minimise this. I did the usual spray of black primer, but then I went over the top with some white ink from my airbrush. As ink is fragile, especially as it cures, I sealed everything with clear varnish before proceeding. Using black and white primer in concert like this is known as ‘zenithal priming’. It sounds fancy, but it is easy and fast to achieve. It is also excellent for showing us volumes on a model, and where lightfall is. As she is wearing a red dress, the white is also a good base for that. Bright, primary colors like red benefit from a lighter priming color.
WHAT DO I WANT TO ACHIEVE WITH THIS MINIATURE?

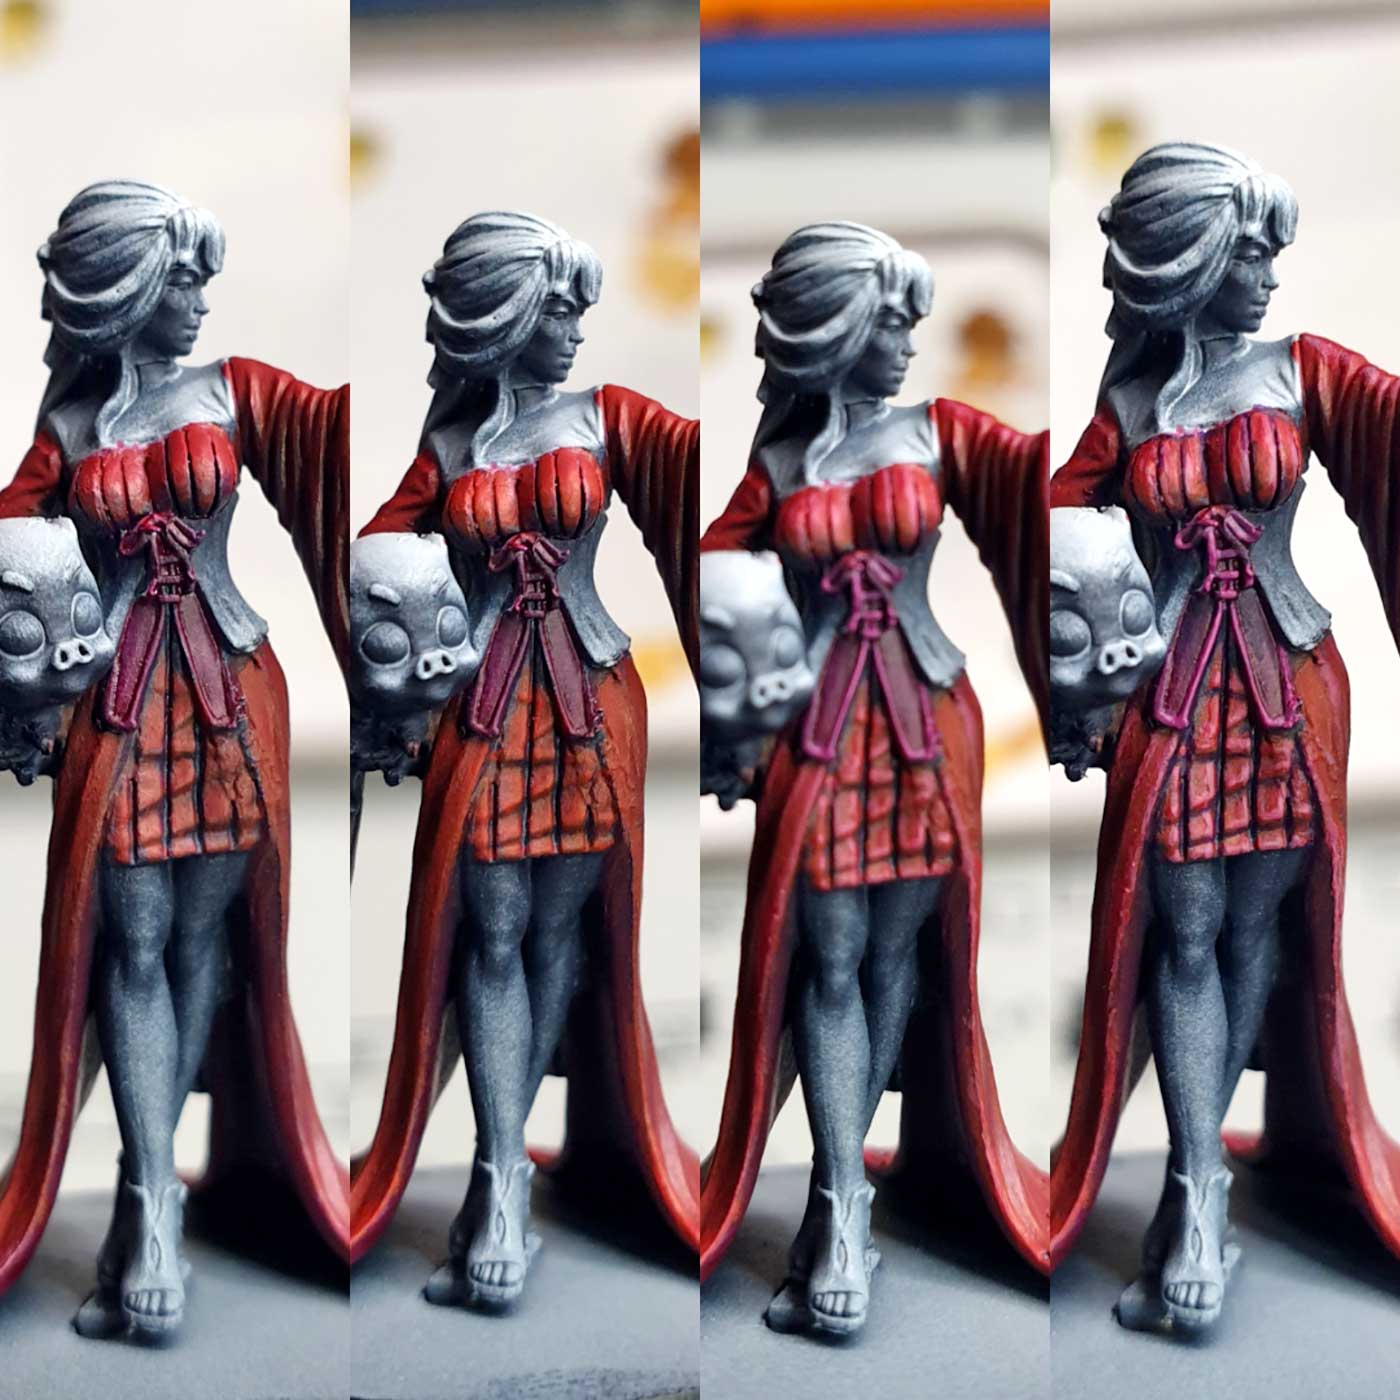
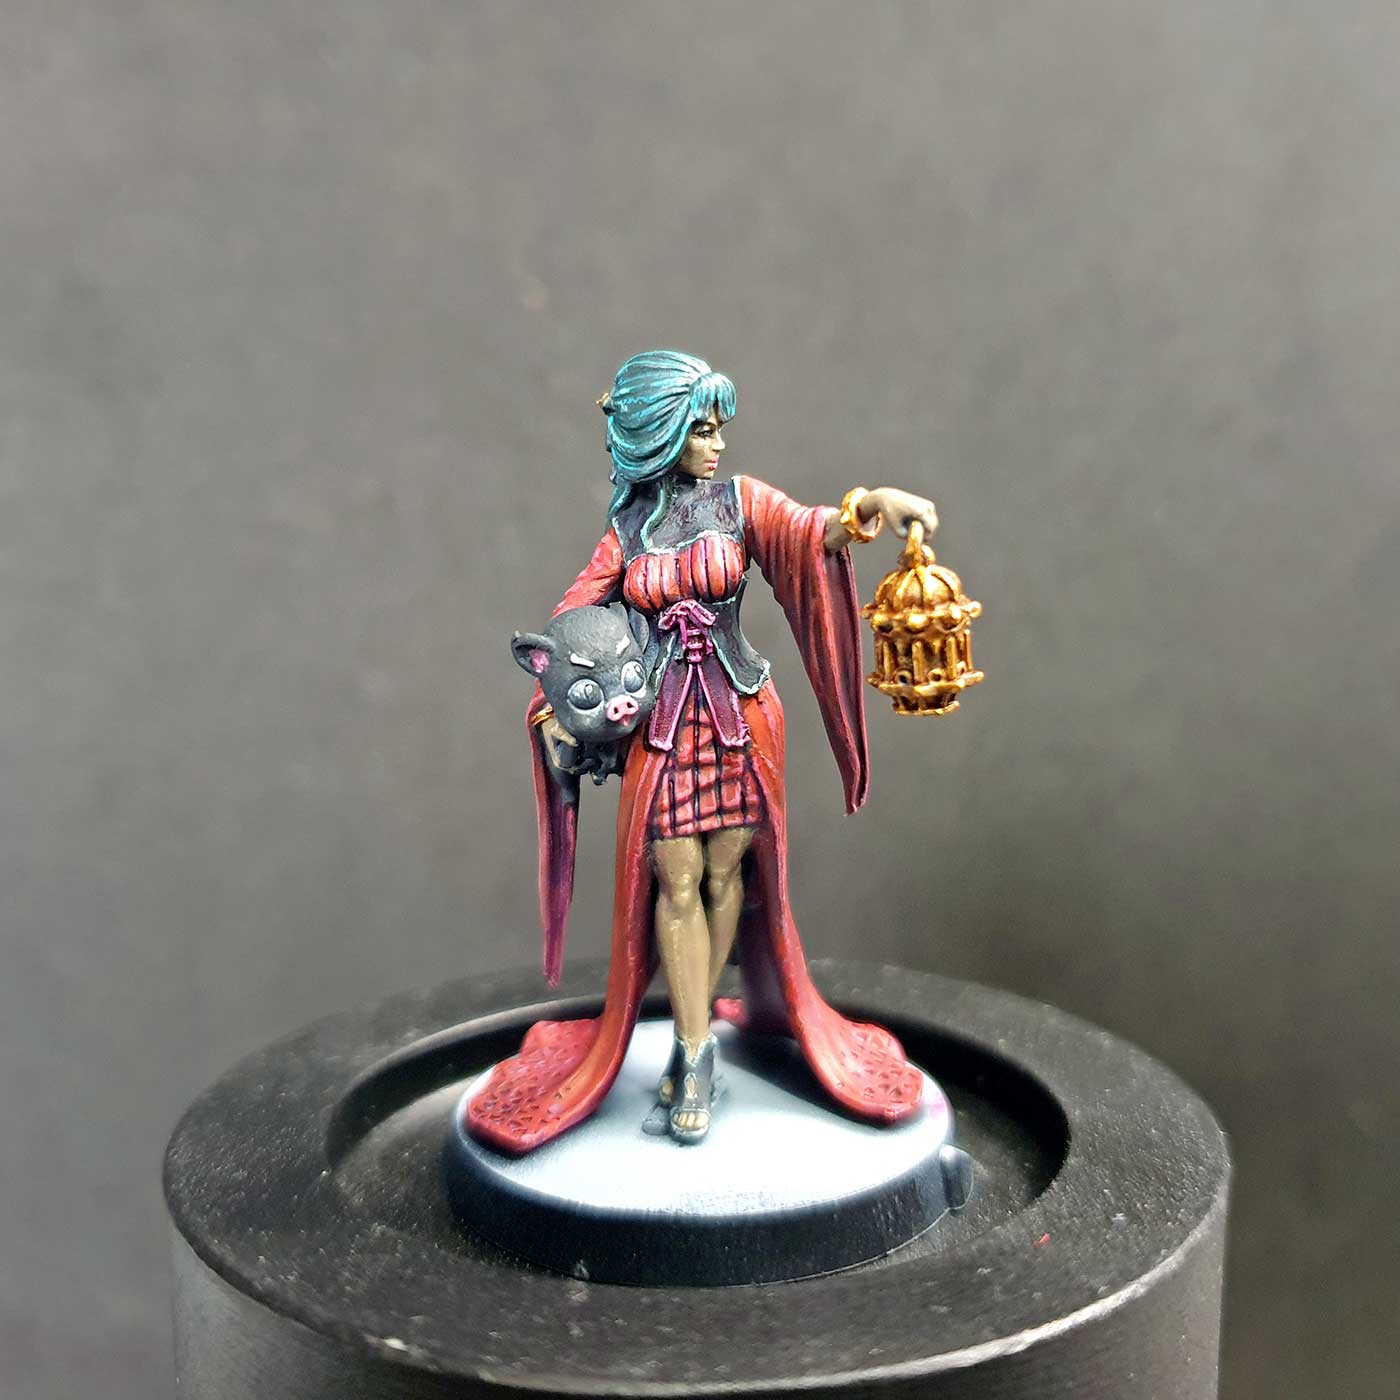
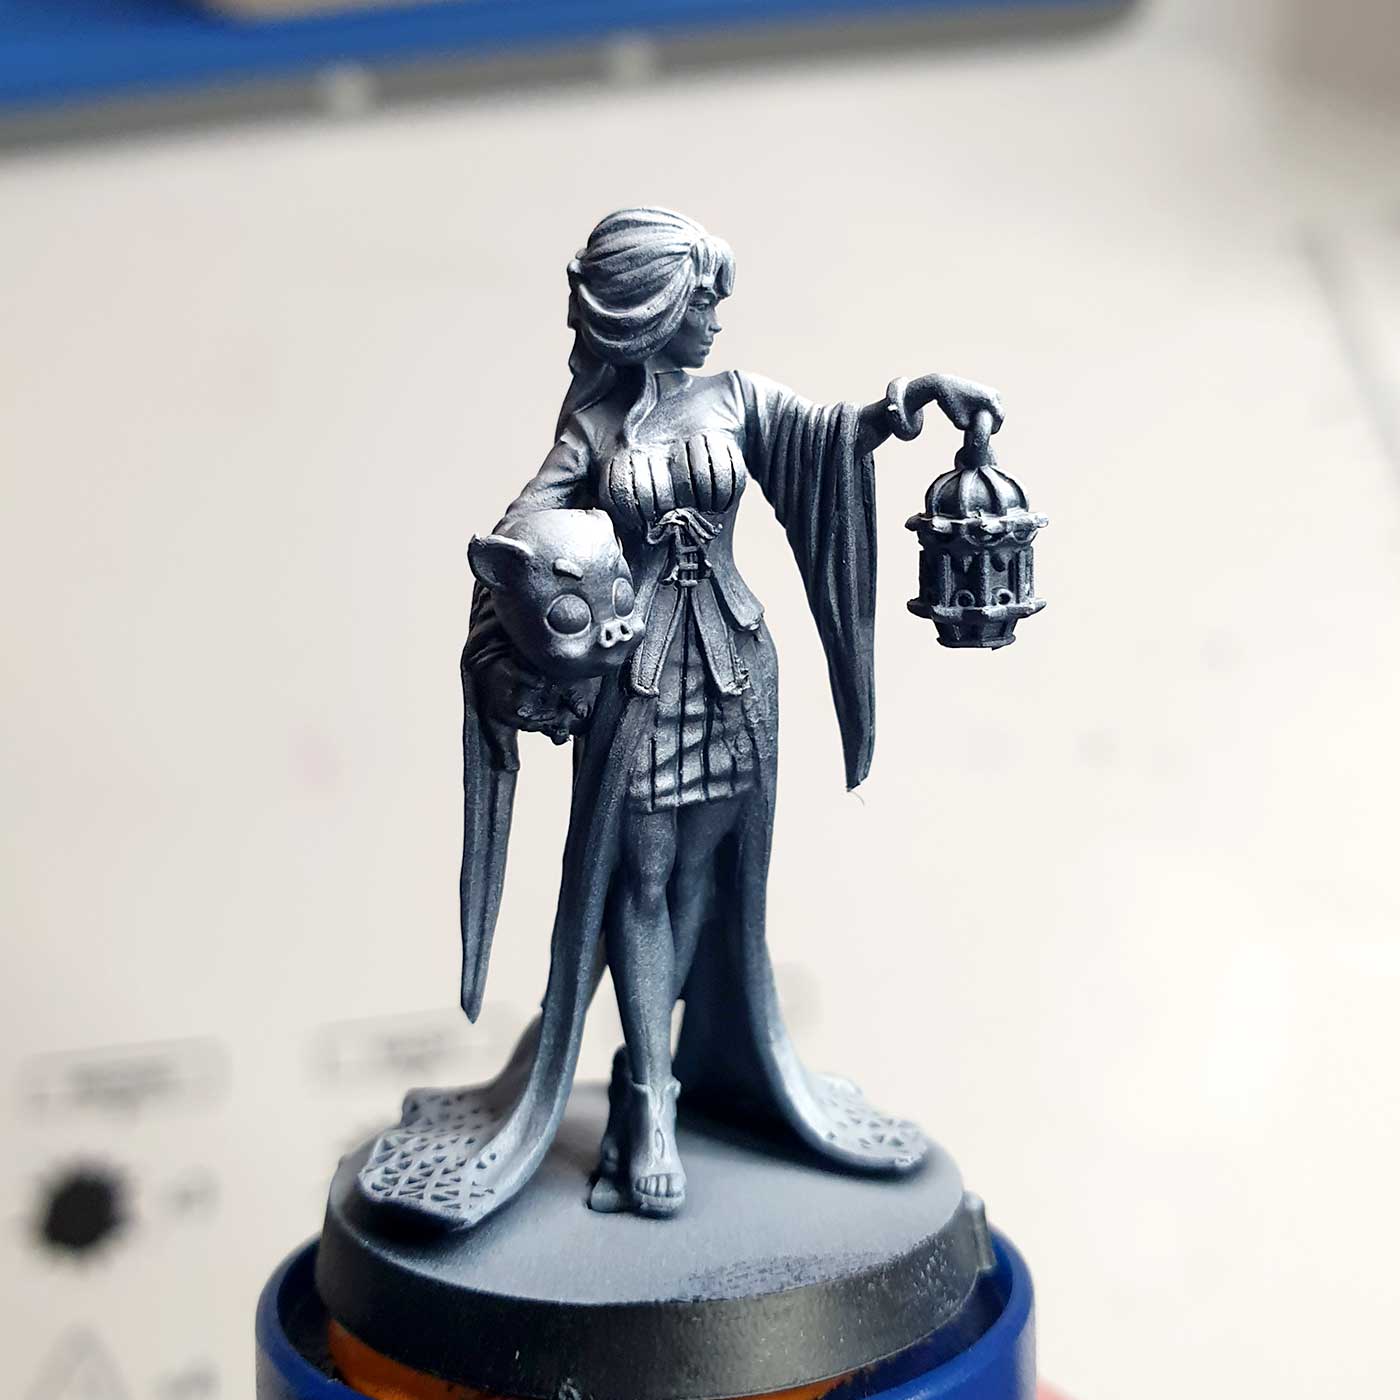
Always think 'what do I want to get from this experience?' before commencing any painting project. There may be multiple considerations. But there should always be an end-goal (e.g. for tabletop), and also a technical area you wish to explore. For me on this project, I wanted a cool display piece. Given her red dress, too, I felt like this would be a good technical area to explore.
Painting Infinity Miniatures: Red Dress

I chose a crimson red as the base color for the dress here. Red can be hard to highlight but here it is ok to push a little into pink. It is a soft, silken item, where diffused pink highlights and purple recesses make sense. Looking online at similar garments will give you a good sense of what is appropriate.
Where possible, I have tried to keep the values of the zenithal prime. You can see, even with a couple of thin coats of dark red, that there is a clear gradient. Places like the bust and sleeves. I subsequently emphasized this with successive highlights of ‘rose’ reds up to pink, for the raised areas. In the recesses, you can see I used violets and purples to make the definition more contrasting. You can see a full breakdown for the red dress on the step-by-step recipe card below!
On this project, I needed RGG size 00 brush for most paintjobs. This is a small, intricate model with lots of details. Even though it is a detail brush, the 00 can basecoat, wash, or layer! That fine tip for precision work is essential here. And so too is Redgrass Games wet palette. It helps keep that acrylic paint workable whilst out of the pot! I always recommend not painting straight from the pot as the paint needs thinning and mixing. With older paints or creamier colors, you will find they can get impurities on your models.
BLOCKING IN BASECOATS

DRESS:
All that red needs breaking up a little. While it is a key feature of the model, visual interest is helped by variety. Now that the main feature is done (the dress) it remains to base color the other features. I chose a dark blue-gray for the collar, shoes, and corset. Off-blacks are easier to shade & highlight, and the cool blue tint will go nicely against the warm red. I also basecoated the hair with a dark green. The boxart has her with blue-green hair and I quite liked that idea, so I ran with it!
SKIN:
For the skin, I chose a tan basecoat color. Again, I was inspired by the boxart for this choice. Recently I had been doing a lot of pale, caucasian skintones, and variety is the spice of life! But also as painters it is good to leave our comfort zones and try new things. Ultimately I was very happy with how the flesh turned out. Whilst I was basecoating it, I was careful to try and keep the light values suggested by the priming.
...But also as painters it is good to leave our comfort zones and try new things.
Painting Infinity Miniatures: Highlights

SKIN:
Continuing with the skin work, I took the tan already on my palette and lightened it. I did this by adding a pale yellow. Pale yellow is an excellent highlight color, especially for skin. I was sure to highlight the cheekbones and nose, as well as the shins (front of the leg) and knees. Next I highlighted the black clothing with successive blue-grays. This gives the clothing a ‘shiny’ appearance and as mentioned, is a good ‘pop’ of contrast with the red.
HAIR:
For her hair, I highlighted it with turquoise. To suggest a sheen, I added spot highlights of a pale blue-gray, too. By lining them up in a series, it suggests light hitting glossy hair. The belt at the front and back are actually purple highlighted by pink- as is the pig nose!
Finishing Details
Lastly is the key details that help finish the piece. I used my 00 for all the sharpest edge highlights or spot highlights. For example I used a small dot of pale yellow for skin highlights. Also I used a similar technique to ‘dot’ some pale blue-gray on the extremes of the black. At this stage, paint should be quite thin so that its brightness isn’t too stark against the previous layers.

The pig eyes were relatively easy to do, as they were so large! I painted these gray, with a black dot for the pupils. I added two small pure white do ts on each, to suggest glossy reflective orbs. The dragon lady’s eyes were much trickier. The upper lids, are sculpted but that’s it. The rest is freehand up to you! I used some thinned black to make almond shapes where the eyes should be. Next, I filled these in with an off-white. Be sure to leave a little of the back as a rim. Lastly I did a small dot of black to represent the pupil/iris. At this scale you cannot reasonably achieve more! Naturally I used my 00 brush for this, too.

...I used some thinned black to make almond shapes where the eyes should be. Next, I filled these in with an off-white. Be sure to leave a little of the back as a rim. Lastly I did a small dot of black to represent the pupil/iris.
James
Painting Infinity Miniatures: COMPLETED PIECE!

And there she is! A true dragon lady. All that remains at this stage is to paint the base. Something I am always slow to get around to doing! But the principle work here is done and I am very happy overall. If you are looking for a ‘soft’ red recipe for fabrics, I would suggest the one I used here. Take the recipe card and amend it according to your needs! – James.
James is using the following RedgrassGames Painting tools
Wet palettes, brushes...