Painting Miniature Stone Wall

Hi! In this tutorial ” painting miniature stone wall “, we are painting a puzzle door from Modiphius’ elder scrolls boardgame. The Elder Scrolls are an incredibly popular series of games, now in ttrpg format. However, as mentioned before, scenery doesn’t always get much painting love when it comes to tabletop games. Once we have painted our PCs and enemies, terrain is an afterthought. So read on and learn some quick tips so you can paint yours quickly and effectively!Â
Table of Contents
PAINTING MINIATURE STONE WALL: GETTING STARTED

Step one was very easy as there was no assembly here! The puzzle door is one solid chunk of resin. That suits me fine, as I am not often a great constructionist when it comes to model making! As far as I could tell, too, there was no flash or sprue gates to file away either. Winning! However, as it is resin, it is a good idea to give it a little clean. Sometimes there is mould release agent residue left behind. This can interfere with the paint adhering to the surface properly. A little rinse in warm water and dishsoap should shift it. I like to use an old, soft toothbrush to get into crevices, and dab it dry.
PRIMING

Next, I sprayed the model with a dark gray primer. Gray is a great priming color as it is a good compromise between white and black primers. Grays can help keep details that may be lost by black or white primers. Plus, here, we are working smarter not harder. We are painting stonework quickly and effectively. So a gray primer is perfect for stone!
Because of all the angles and textures, we can have a lot of fun and paint quicker with a drybrush. We want that dry, scratchy, organic weathering feel that drybrushing can achieve. It is also easier and requires less fine detail control than say, edge highlighting. Painting your ttrpg scenery is quick and fun with drybrush techniques!
WHAT DO I WANT TO ACHIEVE WITH THIS MODEL?

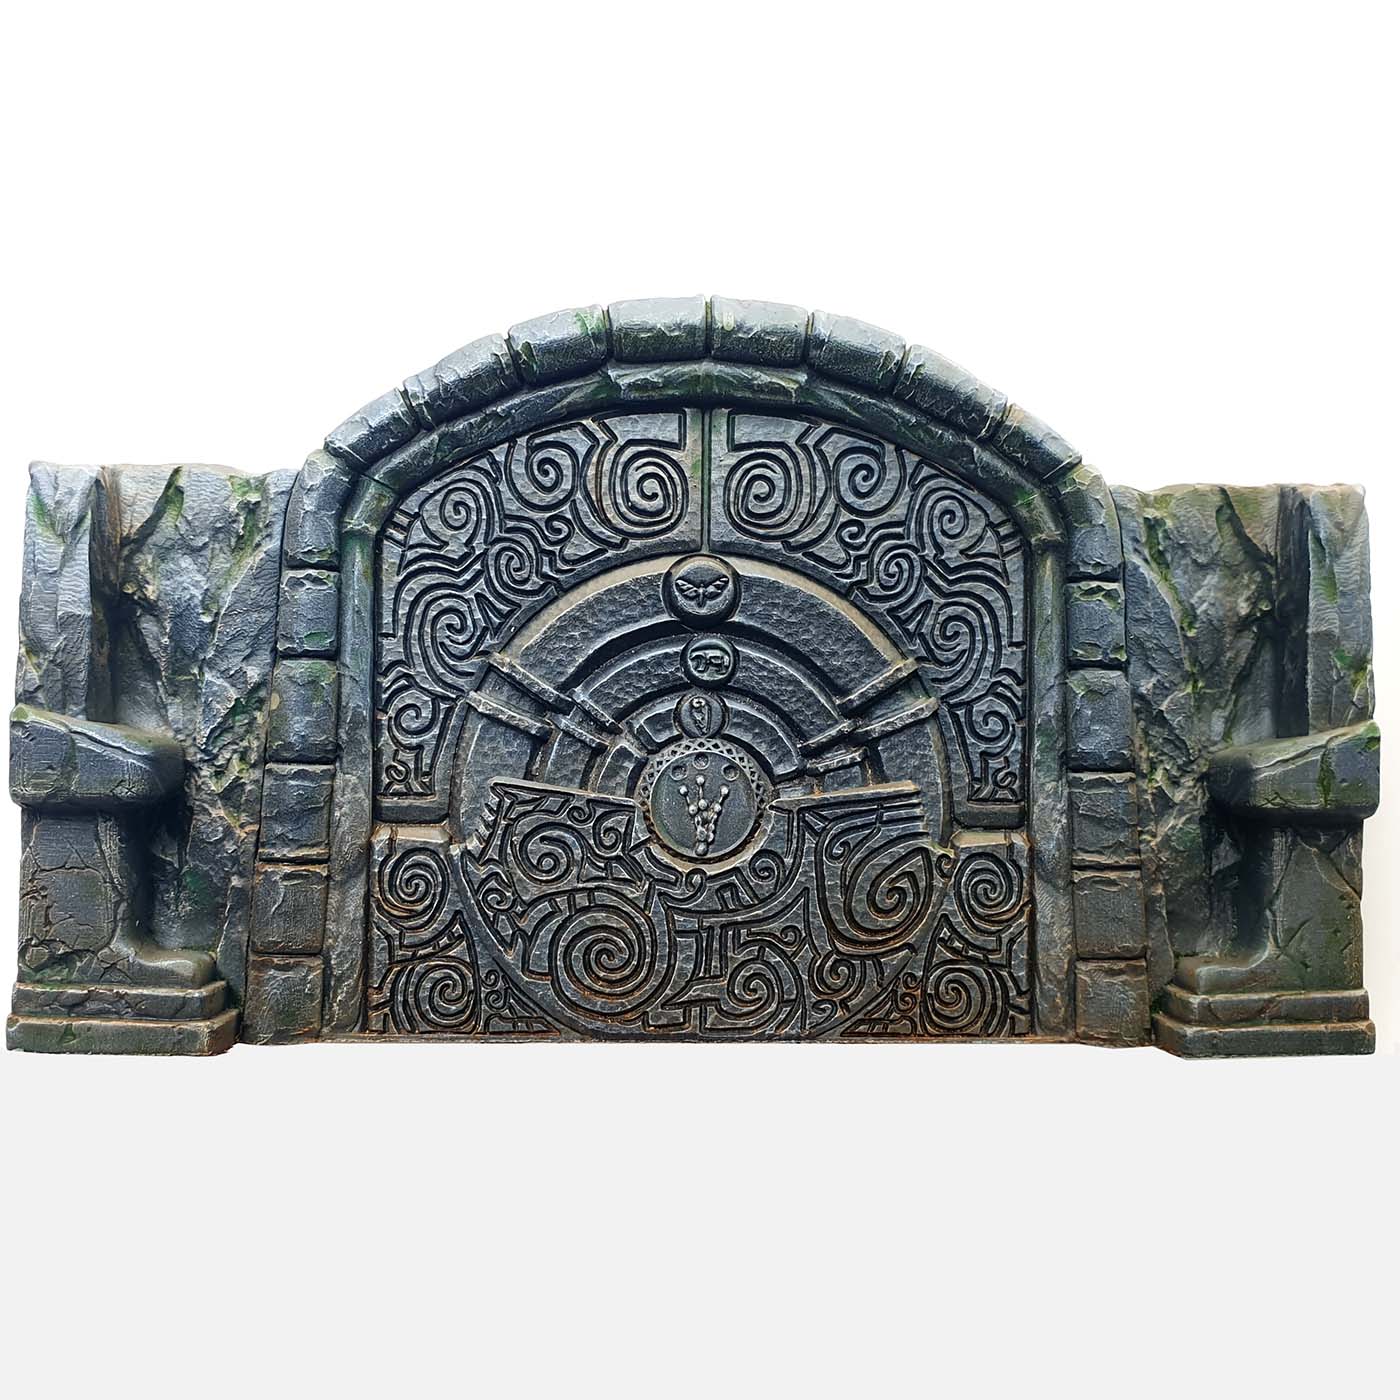
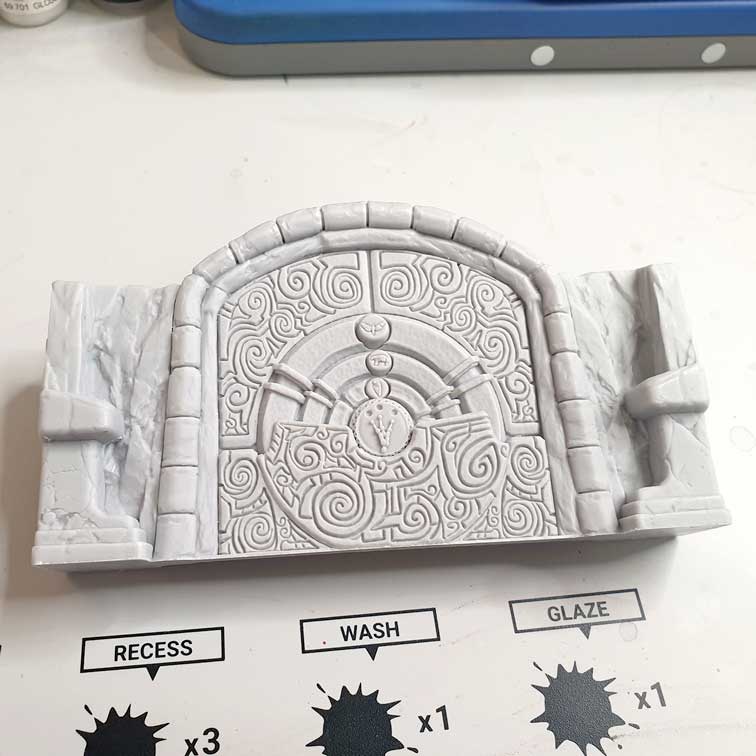
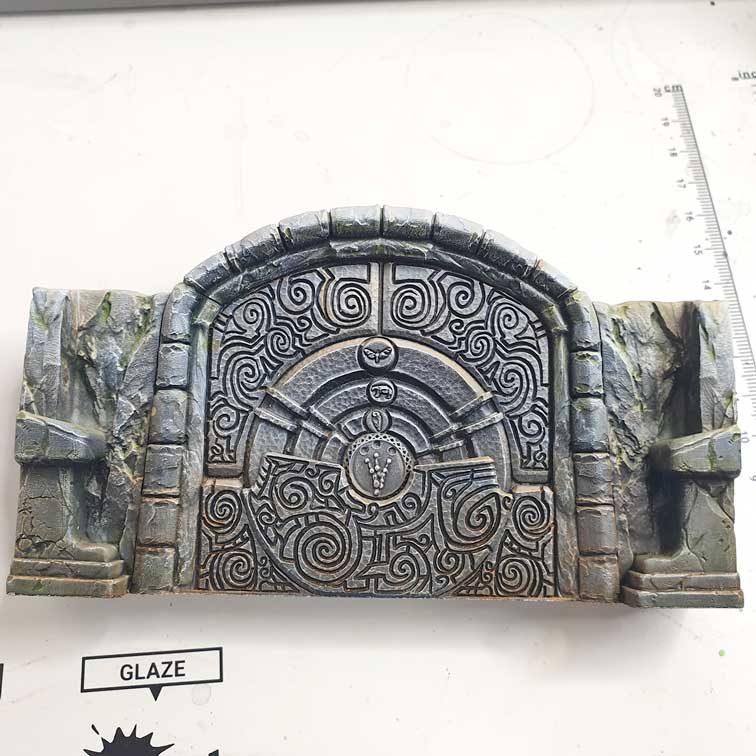
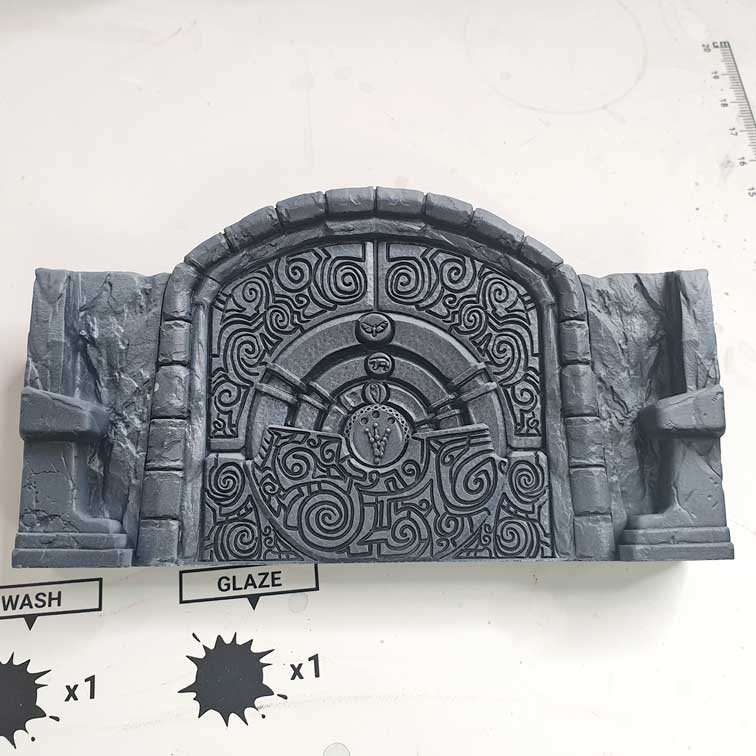
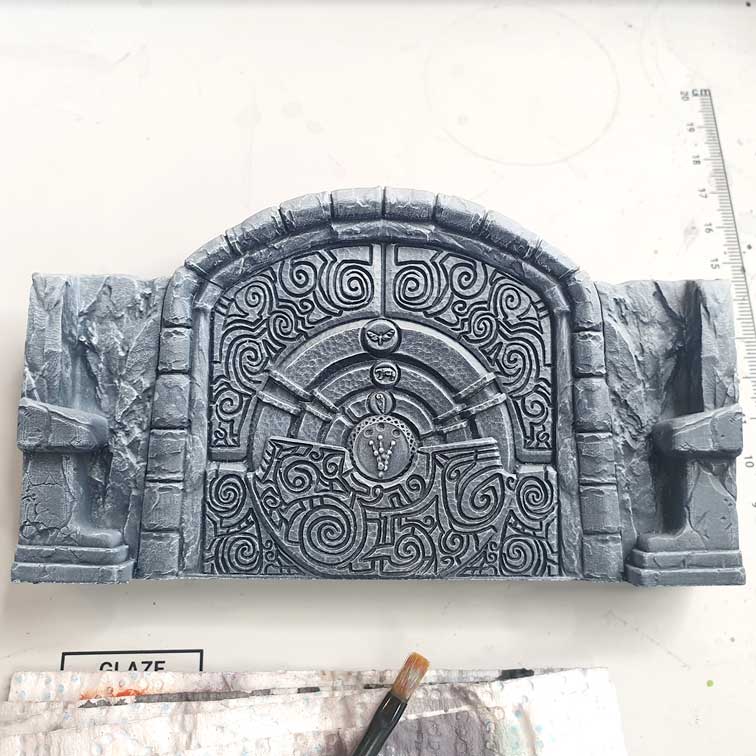
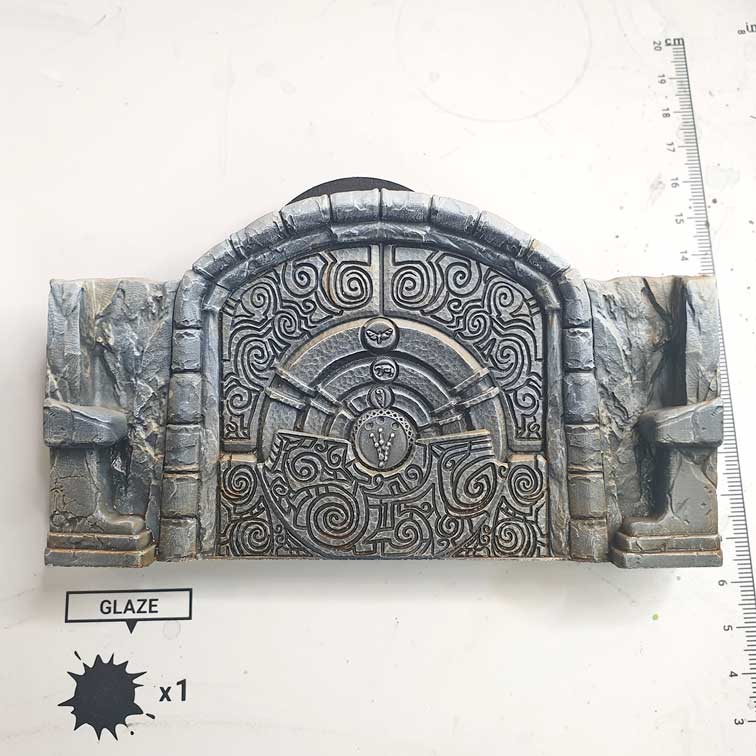
Any time you sit down to start a new paintjob, think about end goals. Here it is not about winning a painting competition. With this, I want to get my scenery done for the game. But I want methods that are effective whilst giving a striking finish. Have manageable goals, that are realistic, and stick to them! I really enjoy using oils and drybrushing techniques so I want to use those. If you enjoy certain painting stages and styles, maximise those! Ultimately the goal is getting them battle ready but have fun doing so.
PAINTING MINIATURE STONE WALL: GRAY STONE

I chose a blue-gray as the base color for the stonework here. I wanted to gradually lighten the stone color from the dark primer, whilst keeping the depth and shadows it afforded.Â
By painting in a ‘top down’ motion, I can keep a nice gradient from lighter to darker gray stones. Although this may take a couple of layers, it is not necessarily slow to do, and has a rewarding finish. I then followed this up with a paler gray, but this time focussing it in certain areas rather than everywhere. I wanted some subtle color modulation to the puzzle door. Google images is a great reference or just talking a walk outside! See how stones naturally weather, stain, and color in different ways. Plus painting it all in a uniform way is not only unrealistic, it is not fun.
I suggest the RGG dry brush for this kind of job. It can really take a beating! Drybrushing is not too friendly to your nice premium brushes. And a Redgrass Games glass palette is invaluable for drier painting techniques like this! Although I also like a little paper towel too, to help remove excess paint from the dry brush before painting.
LAST DRYBRUSH

There are no other basecoats to block in, or non-stone details to take care of. So ultimately this is quite a speedy paintjob to achieve! But that doesn’t mean we can’t enjoy it nor make it effective for the tabletop.
I did one last drybrush highlight, this time with an off-white color. I was really happy with how this final stage made the mini ‘pop’! Sometimes you need to persevere with highlights, until almost suddenly, it all comes together and pops. It is a very satisfying reward! It really brought out the sharpest rock details and contrasted with the dark recesses nicely.
...Sometimes you need to persevere with highlights, until almost suddenly, it all comes together and pops. It is a very satisfying reward!
James
PAINTING MINIATURE STONE WALL: USING OILSÂ

I enjoy using oil paints. Increasingly, I think about how to utilise them into more stages of my painting. When looking for speed, we can make oils fast and effective too! Oils have a reputation for slow drying, but thinned with mineral spirits can greatly speed drying time. I would definitely recommend using them on an RGG Glass Palette as it is a great surface for oil paints and mixes. The wavy accessory would also be good for very thin mixes and filter washes.
Let the capillary action do all the hard work for you! Just ‘dot’ your loaded brush into recesses and watch the oil flow along adding quick and easy definition. Even applying it liberally it is not messy or pooling like an acrylic wash. I used two main oil colors for this scenery. I used a burnt sienna all across the bottom of the puzzle door piece. This simulated accumulated dirt and rising damp. I also used sap green in patches toward the top of the piece. This looked like moss and lichen growth staining the rockface. Adding a little green is the easiest way to show stonework ageing, I think.
Adding a little green is the easiest way to show stonework ageing, I think.
James
FINISHING DETAILS
Lastly is giving the model a once-over and seeing if any details are missed. I used my 00 for any spot highlights on the stonework. An off-white in some spots can bring back a highlight lost under the oil washes.
I added a little brighter green to some of the lichen patches for variety. Gloss varnish would also work here. Apply it over some of the streaks or lichen stains to make the rock there look dank. This would contrast nicely if you matte varnish the unstained rock faces so they look really dry.

PAINTING MINIATURE STONE WALL: RECIPE CARD

PAINTING MINIATURE STONE WALL: COMPLETED PIECE!

James is using the following RedgrassGames Painting tools
Wet palettes, brushes...